3.2.4. Digitizing Structures
3.2.4.1. Digitizing
Select the structure layer in that layer panel and then select the edit mode.
Now the cursor changes to the digitizing symbol and you can select the location of the new polygon element.
Then the structure form opens and you can start adding data :
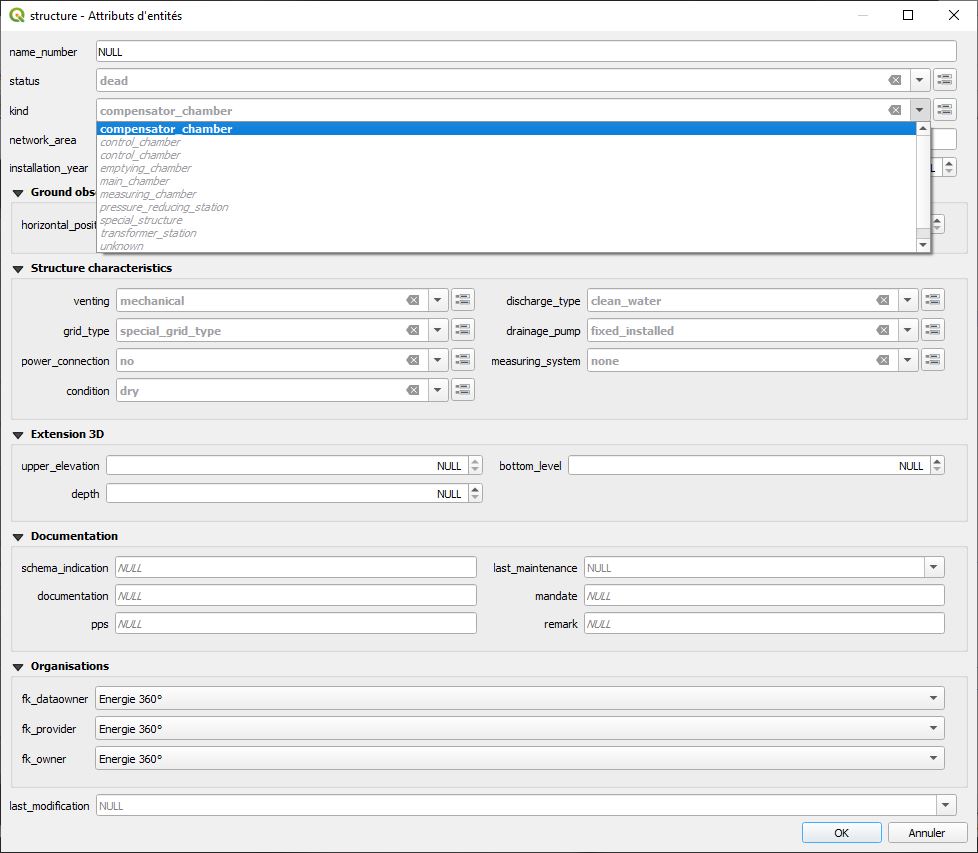
Select the kind of structure you want (preselected is ‚compensator_chamber‘):
compensator_chamber
control_chamber
emptying_chamber
main_chamber
measuring_chamber
pressure_reducing_station
special_structure
transformer_station
unknown
Then add the name_number (this is the attribute that will be displayed on the map).
Bemerkung
If you do not enter an identifier, TDH will enter the obj_id also as identifier (you can change later). As default, the identifier of the district heating structure is also the identifier of the cover and of the district heating node.
Add other mandatory attributes. You can also add attributes in the other sections (Ground observations, Structure characteristics, Extension 3D, Documentation, Organisations, etc.).
Bemerkung
The idea of the head of the form is, that in the normal digitizing process (95% of the structures) the user has not to change the attributes that are necessary in the other sections.
Click OK to close the form.
Save the information of this layer by selecting the Floppy icon in the menu bar.
You can re-edit your polygon object selecting the edit mode and then click with the info cursor on the object you want to edit. If you do not select the edit mode, you can just look at the existing data.
For detailed information about editing see the Editing of existing data chapter.