3.2.5. Digitizing Trench
3.2.5.1. Digitizing
Select the trench layer in that layer panel and then select the edit mode. Select the polygon tool in the digitizing toolbar.
Now the cursor changes to the digitizing symbol and you can select the location of the new polygon element.
Then the trench form opens and you can start adding data :
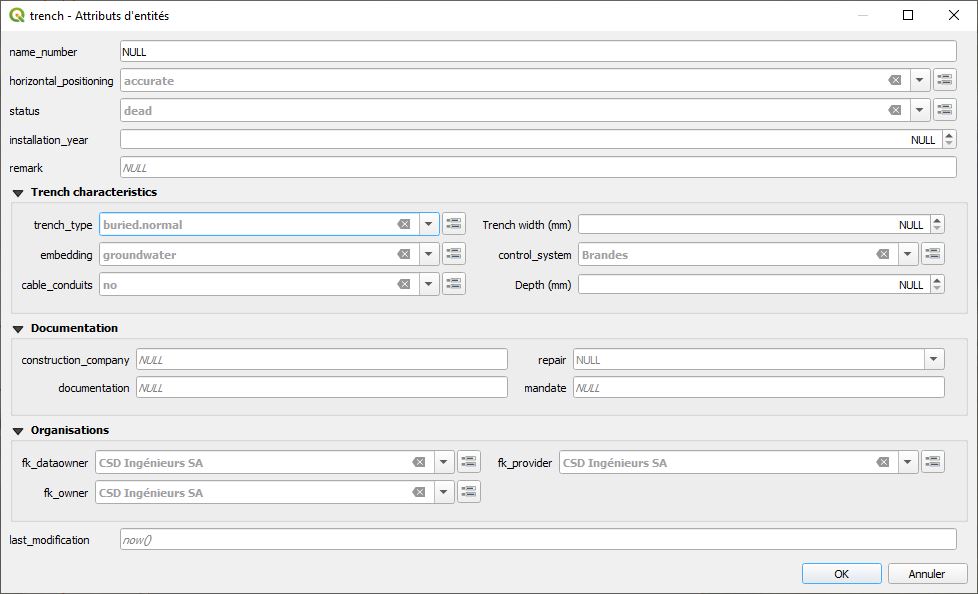
Select the status you want (preselected is ‚dead‘):
dead
inoperative
inoperative.reserve
operationnal
operationnal.tentative
other.planned
other.project
Select the trench_type you want (preselected is ‚buried_normal‘):
burried.extension_pads
burried.normal
hooded_channel
hydraulic_pressure_pipe
insitu_concrete_channel
overhead_line
protection_tube
unknown
vault
walkable_channel
Then add the name_number (this is the attribute that will be displayed on the map).
Bemerkung
If you do not enter an identifier, TDH will enter the obj_id also as identifier (you can change later).
Add other mandatory attributes. You can also add attributes in the other sections (Ground observations, Trench characteristics, Documentation, Organisations, etc.).
Bemerkung
The idea of the head of the form is, that in the normal digitizing process (95% of the trench) the user has not to change the attributes that are necessary in the other sections.
Click OK to close the form.
Save the information of this layer by selecting the Floppy icon in the menu bar.
You can re-edit your polygon object selecting the edit mode and then click with the info cursor on the object you want to edit. If you do not select the edit mode, you can just look at the existing data.
For detailed information about editing see the Editing of existing data chapter.