3.2.3. Digitizing Pipe Sections
3.2.3.1. General
TDH has no wizard to correctly build pipe_sections and connect them to pipe_points (normal or feed).
Attention
Start digitizing in the direction of the flow by starting with the from pipe_point feed start node and finishing with the to pipe_point feed end node.
3.2.3.2. Digitizing
Make sure that the automatic snapping tool is activated for all layers.
Select the pipe_section layer in that layer panel and then select the edit mode.
In digitizing mode the cursor will automatically snap to the nearest district heating node or pipe_section. When left clicking a line starts to draw.
With further left clicks anywhere you can define intermediary points of the reach progression. You can also directly select another pipe_point_normal to draw a straight channel.
You finish digitizing the line by right clicking. This will make the pipe_section feature attributes window appear and you can start adding data:
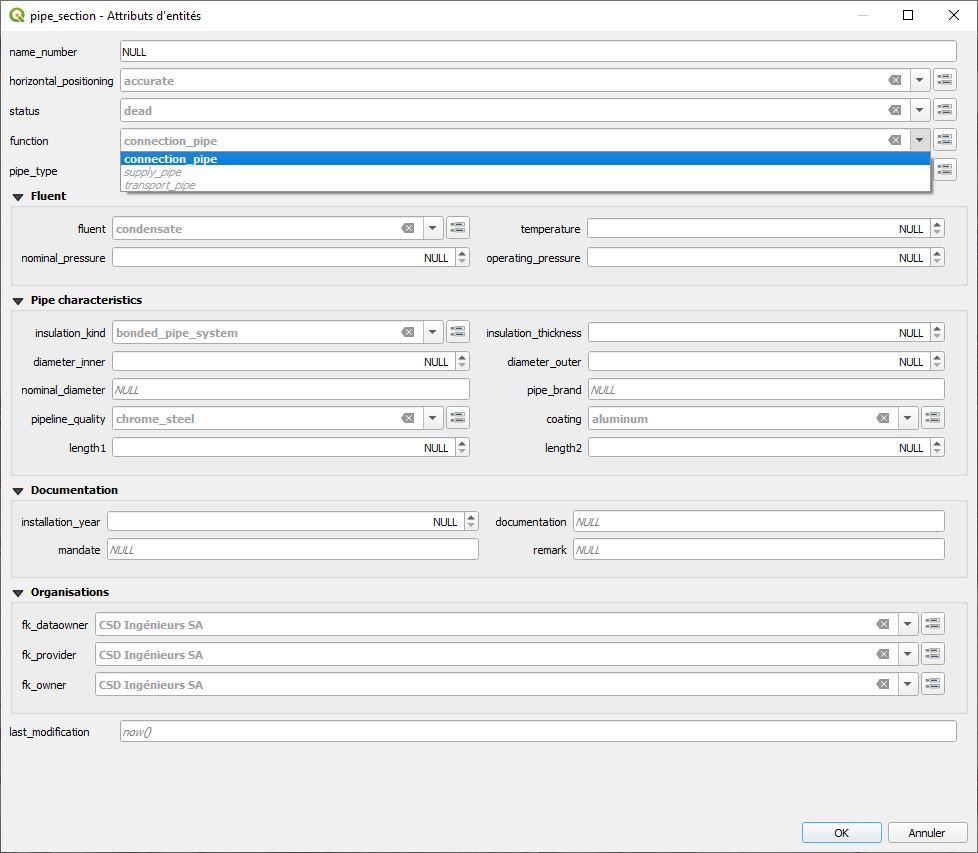
Select the function of the pipe_section you want (preselected is “connection_pipe”):
connection_pipe
supply_pipe
transport_pipe
Note
Keep in mind that the finishing point of the line is the last point where you left clicked. Thus, for digitizing a simple line with 2 points you need two left clicks to digitize the line and one right click to finish the line digitizing.
Note
If you do not enter an name_number identifier on this form, TDH will enter the obj_id also as identifier (you can change later).
When finished, then click the OK button.
Save the information of this layer by selecting the Floppy icon in the menu bar.
You can re-edit your polygon object selecting the edit mode and then click with the info cursor on the object you want to edit. If you do not select the edit mode, you can just look at the existing data.
For detailed information about editing see the Editing of existing data chapter.